Friday, 23 September 2011

Rainclouds and Forest Walks

Here in Scotland, Summer has been over for a while now (since June if you're interested), so I'm thinking it's high time to break out the autumnal knitting patterns. And here they are! Both are knitted up in Shilasdair Luxury DK, which is an absolutely gorgeous yarn naturally dyed on the Isle of Skye. It's fantastic value too, the skeins are giant!

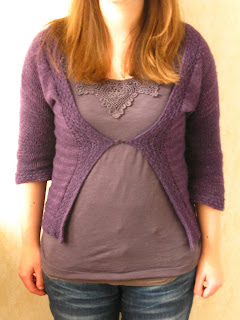
Raincloud cardigan knitting pattern by Littletheorem, quick easy knit cardigan


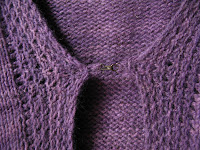
First up is the Raincloud Cardigan. I really love this one, it has become my number one wardrobe staple. I am glued to it. It's cosy, but the single fastening and three-quarter length sleeves mean you don't overheat. It's available to purchase for $3 from Ravelry and my Etsy shop. Sizing details can be found there too.

Raincloud cardigan knitting pattern by Littletheorem, quick easy knit cardigan


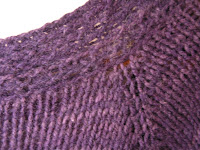
Raincloud cardigan knitting pattern by Littletheorem, quick easy knit cardiganRaincloud cardigan knitting pattern by Littletheorem, quick easy knit cardigan


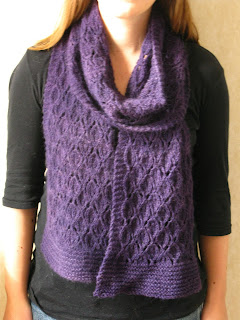
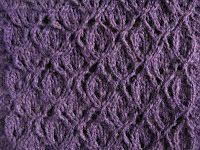
Next there's my Forest Walk scarf. I knitted this one up as a birthday present for a friend. It's a quick knit but looks very impressive. It uses just over one skein of the Shilasdair luxury DK, but you could squeeze one out of a single skein. My version is around 6 feet long so it'd be fine to make it a bit shorter. I made both the cardigan (smallest size) and the scarf from 3 skeins. Again, it's available to purchase from Ravelry and my Etsy shop.

Forest walk scarf knitting pattern by Littletheorem, quick easy knit lace scarf

Forest walk scarf knitting pattern by Littletheorem, quick easy knit lace scarf


Forest walk scarf knitting pattern by Littletheorem, quick easy knit lace scarf


Friday, 9 September 2011

Cocoa Wrap


An easy wrap pattern that's quick to knit in chunky yarn. The slipped stitches make the fabric extra dense. This is sure to keep you cosy when you're curled up with your cocoa! The wrap pictured was knitted with my own handspun Bluefaced Leicester yarn, but Rowan Purelife British Sheep Breeds Chunky is the correct gauge and would be just as nice. Pattern is available to download from Ravelry.


Yarn : Five skeins Rowan Purelife British Sheep Breeds Chunky = 550m in total.


Needles :  5mm/US 8 straight needles

Gauge:  14sts = 4" in stocking stitch

Size: 12" x 60"

Notation: 
k = knit
p = purl
sl = slip 
kw = knitwise
pw = purlwise
CO = cast on
RS = right-side
WS = wrong-side


Twisted Slip Stitch Rib Pattern:
Row 1: sl1 pw, *p1 k1* to end of row (don't "untwist" twisted stitches by knitting into the back of them!)
Row 2: sl1 pw *k1 sl1 kw with yarn held forward* to last two stitches, k2


Directions:

CO 61 stitches. Work in Twisted Slip Stitch Rib Pattern until wrap measures 60", ending on row 1 of pattern. Bind off all stitches on wrong side. Weave in any loose ends and you're done!


Sunday, 4 September 2011

Embroidered Armwarmers


Cute armwarmers in extra soft yarn with some folk-style embroidery. I found this embroidery technique in “Needle Lace Techniques and Inspiration” by Jill Nordfors Clark. It’s a beautiful book with instructions for some amazing needlework. This pattern is also available to download free from my Ravelry Store

Yarn : Rowan Lima, one 50g ball ( = 100 metres/109 yards). 

Needles : Four 5mm/US 8 dpns.

Gauge: 18sts = 4" in stocking stitch.
Size: One size fits all, 26cm long.

Notation: 
k = knit
p = purl
sl = slip purlwise
CO = cast on


Directions:
To make armwarmers: Cast on 27 stitches over 3 dpns and join in the round. Work in k2 p1 rib for 6 rows. Now work in stocking stitch (i.e. knit every row) for 13cm. Make thumb hole as follows:

Row 1: sl1, knit to end of row, turn.
Row 2: Don’t continue working in the round, but on WS of armwarmer sl1, purl to end of row, turn.

Work these last two rows three more times. Next row: sl1, knit to end of row. To end the thumb hole: don’t turn your work at the end of this row, but start working stocking stitch in the round again. Keep going in stocking stitch for 6cm more (total length of armwarmer should be 24cm). Now work garter stitch in the round for 4 rows, i.e. purl the first row, knit the second, purl the third and knit the fourth. Now bind off all stitches and weave in loose ends. Make two armwarmers. 


Embroidery:
Step 1: Choose four colours of embroidery thread, number them one to four:


Step 2:  Lay the first armwarmer out facing upwards and thread your embroidery needle with thread colour 1. The stocking stitch fabric is made up of rows and columns of little upside-down v’s. Find the 6th row down from the garter stitch band at the top of your armwarmer and bring your needle up through the fabric just to the left of the second little upside-down v in the row.


Step 3: Now find the upside-down v two rows up and one column to the right. Bring your needle from right to left under the upside-down v and out the other side.


Step 4: Find the upside-down v two rows down and one column to the right. Bring your needle from right to left under the upside-down v and out the other side.


Step 5: Repeat the last two steps until you get to the other side of your armwarmer (don’t worry too much if it’s a little messy, the next few steps will neaten it up).


Step 6: Thread your embroidery needle with thread 2, bring it up through the armwarmer just above where you started with thread 1.


Step 7: Bring the thread under the first stitch in thread 1 from bottom to top.


Step 8: Bring the thread under the next stitch in thread 1 from top to bottom.


Step 9: Bring the thread under the next stitch in thread one from bottom to top.


Step 10: Repeat the last two steps until you get to the last stitch in thread 1. Bring the needle through to the back of the armwarmer to match the other side.


Step 11: Repeat this process three rows below using threads 3 and 4, and once more three rows below that using threads 1 and 2 again.


Step 12: Secure all loose threads at the back. There shouldn’t be anything to catch your hand on when you put the armwarmer on.


Now repeat for the other armwarmer. Make sure that the thumbhole is one the other side for the second one!