Wednesday, 12 January 2011

Mae Geri Scarf

Please note: this pattern is now available to download as a pdf from Craftsy for $2. It will still be freely available on this blog, but I thought people might want the opportunity to download a pdf version. 

Mae Geri Scarf by Littletheorem

 I knitted this scarf for my dear old mum. The name sounds very poetic and Japanese, maybe you'd guess it meant cherry blossom or something similar, something suitable for a lacy silk scarf. It means front kick. You see, my mother is in fact a third dan black belt in shotokan karate (i.e. she means business). But, like the ninja she is, she keeps this quite well hidden: a lacy scarf is just part of her disguise...
 
lace scarf pattern

Yarn: Debbie Bliss Pure Silk. Two balls =250m

Needles: 4.5mm / US 7 needles

Gauge:  22 stitches = 4'' in stocking stitch with 4mm/US 6 straight needles
 
Size: One size, 6'' x 60''

Notation: 
k = knit
p = purl
CO = cast on
k2tog = knit two stitches together
yo = bring the yarn to the front of your knitting on knit rows and the back on purl rows
k2togtbl = knit two together through the back of the loops
p2tog = purl two stitches together
p2togtbl = purl two stitches together through the back of the loops

free lace knitting patterns

Directions:
CO 29 stitches. Work in garter stitch (knit every row) for 8 rows. Now work pattern as follows:

Row 1: k6, *k2tog, yo, k5* to last 2 stitches, k2.
Row 2: k2, p3, *p2togtbl, yo, p1, yo, p2tog, p2* to last 3 stitches, p1, k2.
Row 3: k4, *k2tog, yo, k3, yo, sl1, k1, psso* to last 4 stitches, k4.
Row 4: k2, purl to last 2 stitches, k2.
Row 5: k4, * yo, sl1, k1, psso, k5* to last 4 stitches, k4.
Row 6: k2, p1, *p1, yo, p2tog, p2, p2togtbl, yo* to last 5 stitches, p3, k2.
Row 7: k3, *k3, yo, sl1, k1, psso, k2tog, yo,* to last 5 stitches, k5.
Row 8: k2, purl to last 2 stitches, k2.

Repeat these 8 rows until scarf measures 60'', or as long as desired. Knit 8 rows and bind off on wrong side. Weave in loose ends.

free lace scarf knitting pattern

Sunday, 9 January 2011

Carsaig Wristwarmers


Chunky knit wristwarmers in gorgeous, super-bulky, extra soft and smooshy yarn.  Love the pattern but don't have the time to make them? Then there's a pair in my etsy shop waiting for you!


Yarn: One ball Debbie Bliss Como = 42m

 Needles: 10mm / US 15 needles

Gauge:  10 stitches = 4'' in stocking stitch

Size: One size, 15cm x 20cm circumference

Notation: 
k = knit
p = purl
CO = cast on

Directions:

Mitts (Makes 2):

Tip: I knitted both mitts at the same time using yarn from the outside and from the centre of the ball of yarn so that I could get them as long as possible with one skein. Feel free not to do this though!

CO 19 stitches. Work every row as follows:
k1 p1 *k2 p1* to last two stitches, k2.

When mitts are 15cm long (or as long as desired) bind off. Sew the two edges together leaving a hole for the thumb. Weave in loose ends.


Saturday, 1 January 2011

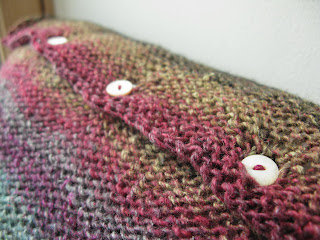
Yuzen Cushion Cover

I made this cushion cover seamless and reversible because I couldn't decide which side I liked best, they're both so nice! I absolutely love this yarn, the colours are so beautiful I smile every time I look at it.


Yarn : 2 balls Noro Yuzen = 220m

Needles : One 4.5mm = US 7 circular needle

Extra Materials: 8 buttons, scrap yarn for provisional cast on, 40cmx40cm cushion.

Gauge: 17 stitches = 10cm in stocking stitch.

Size: 40cm x 40cm

Notation: 
k = knit
p = purl
CO = cast on
k2tog = knit two stitches together
yo = bring the yarn over the needle

Directions:

Using a provisional crochet cast on, cast on 56 stitches (see tutorial). Now cast on 50 more stitches the normal way. Knit stocking stitch in the round (i.e. knit every stitch) until cushion cover measures 40cm when slightly stretched (there's not quite enough yarn in 2 skeins of yuzen to make the cushion cover unstretched (sadly)) . Slip 53 stitches onto one side of the circular needle and 53 to the other and bind off using kitchener stitch. 
Now pick up the remaining 56 stitches from your provisional cast on, so that you start on a right side row (= stocking stitch, not rev st. st.). Work as follows:
Row 1: (right side) knit 
Row 2: k2 purl to last two stitches, k2.

Repeat these two rows until you have worked 2'' from provisional cast on. 
Next row: k9 k2tog yo *k10 k2 tog yo* 3 times k9.
Work row 2 as above once more, then knit two rows. BO on wrong side.

The yo's form buttonholes. Sew buttons onto each side to meet up with buttonholes so that the cushion cover is reversible.

Weave in loose ends along the wrong side rows on a stripe of the same colour.